

Find things in your fleet
The fleet has one door. The Fleet page opens on the canvas; the
list view (the toggle at the top right, or ?view=list in the address) swaps it for
the index tables, one kind tab each for Locations, Systems, and Components. Nodes keeps
its own sidebar entry: collection infrastructure, not fleet inventory. The tabs share one shape,
so once you know one you know them all. This page is how you find something in that
inventory; working with an entity is what you do once you
have opened it. The old /locations, /systems, and /components addresses still work:
each lands on its tab.
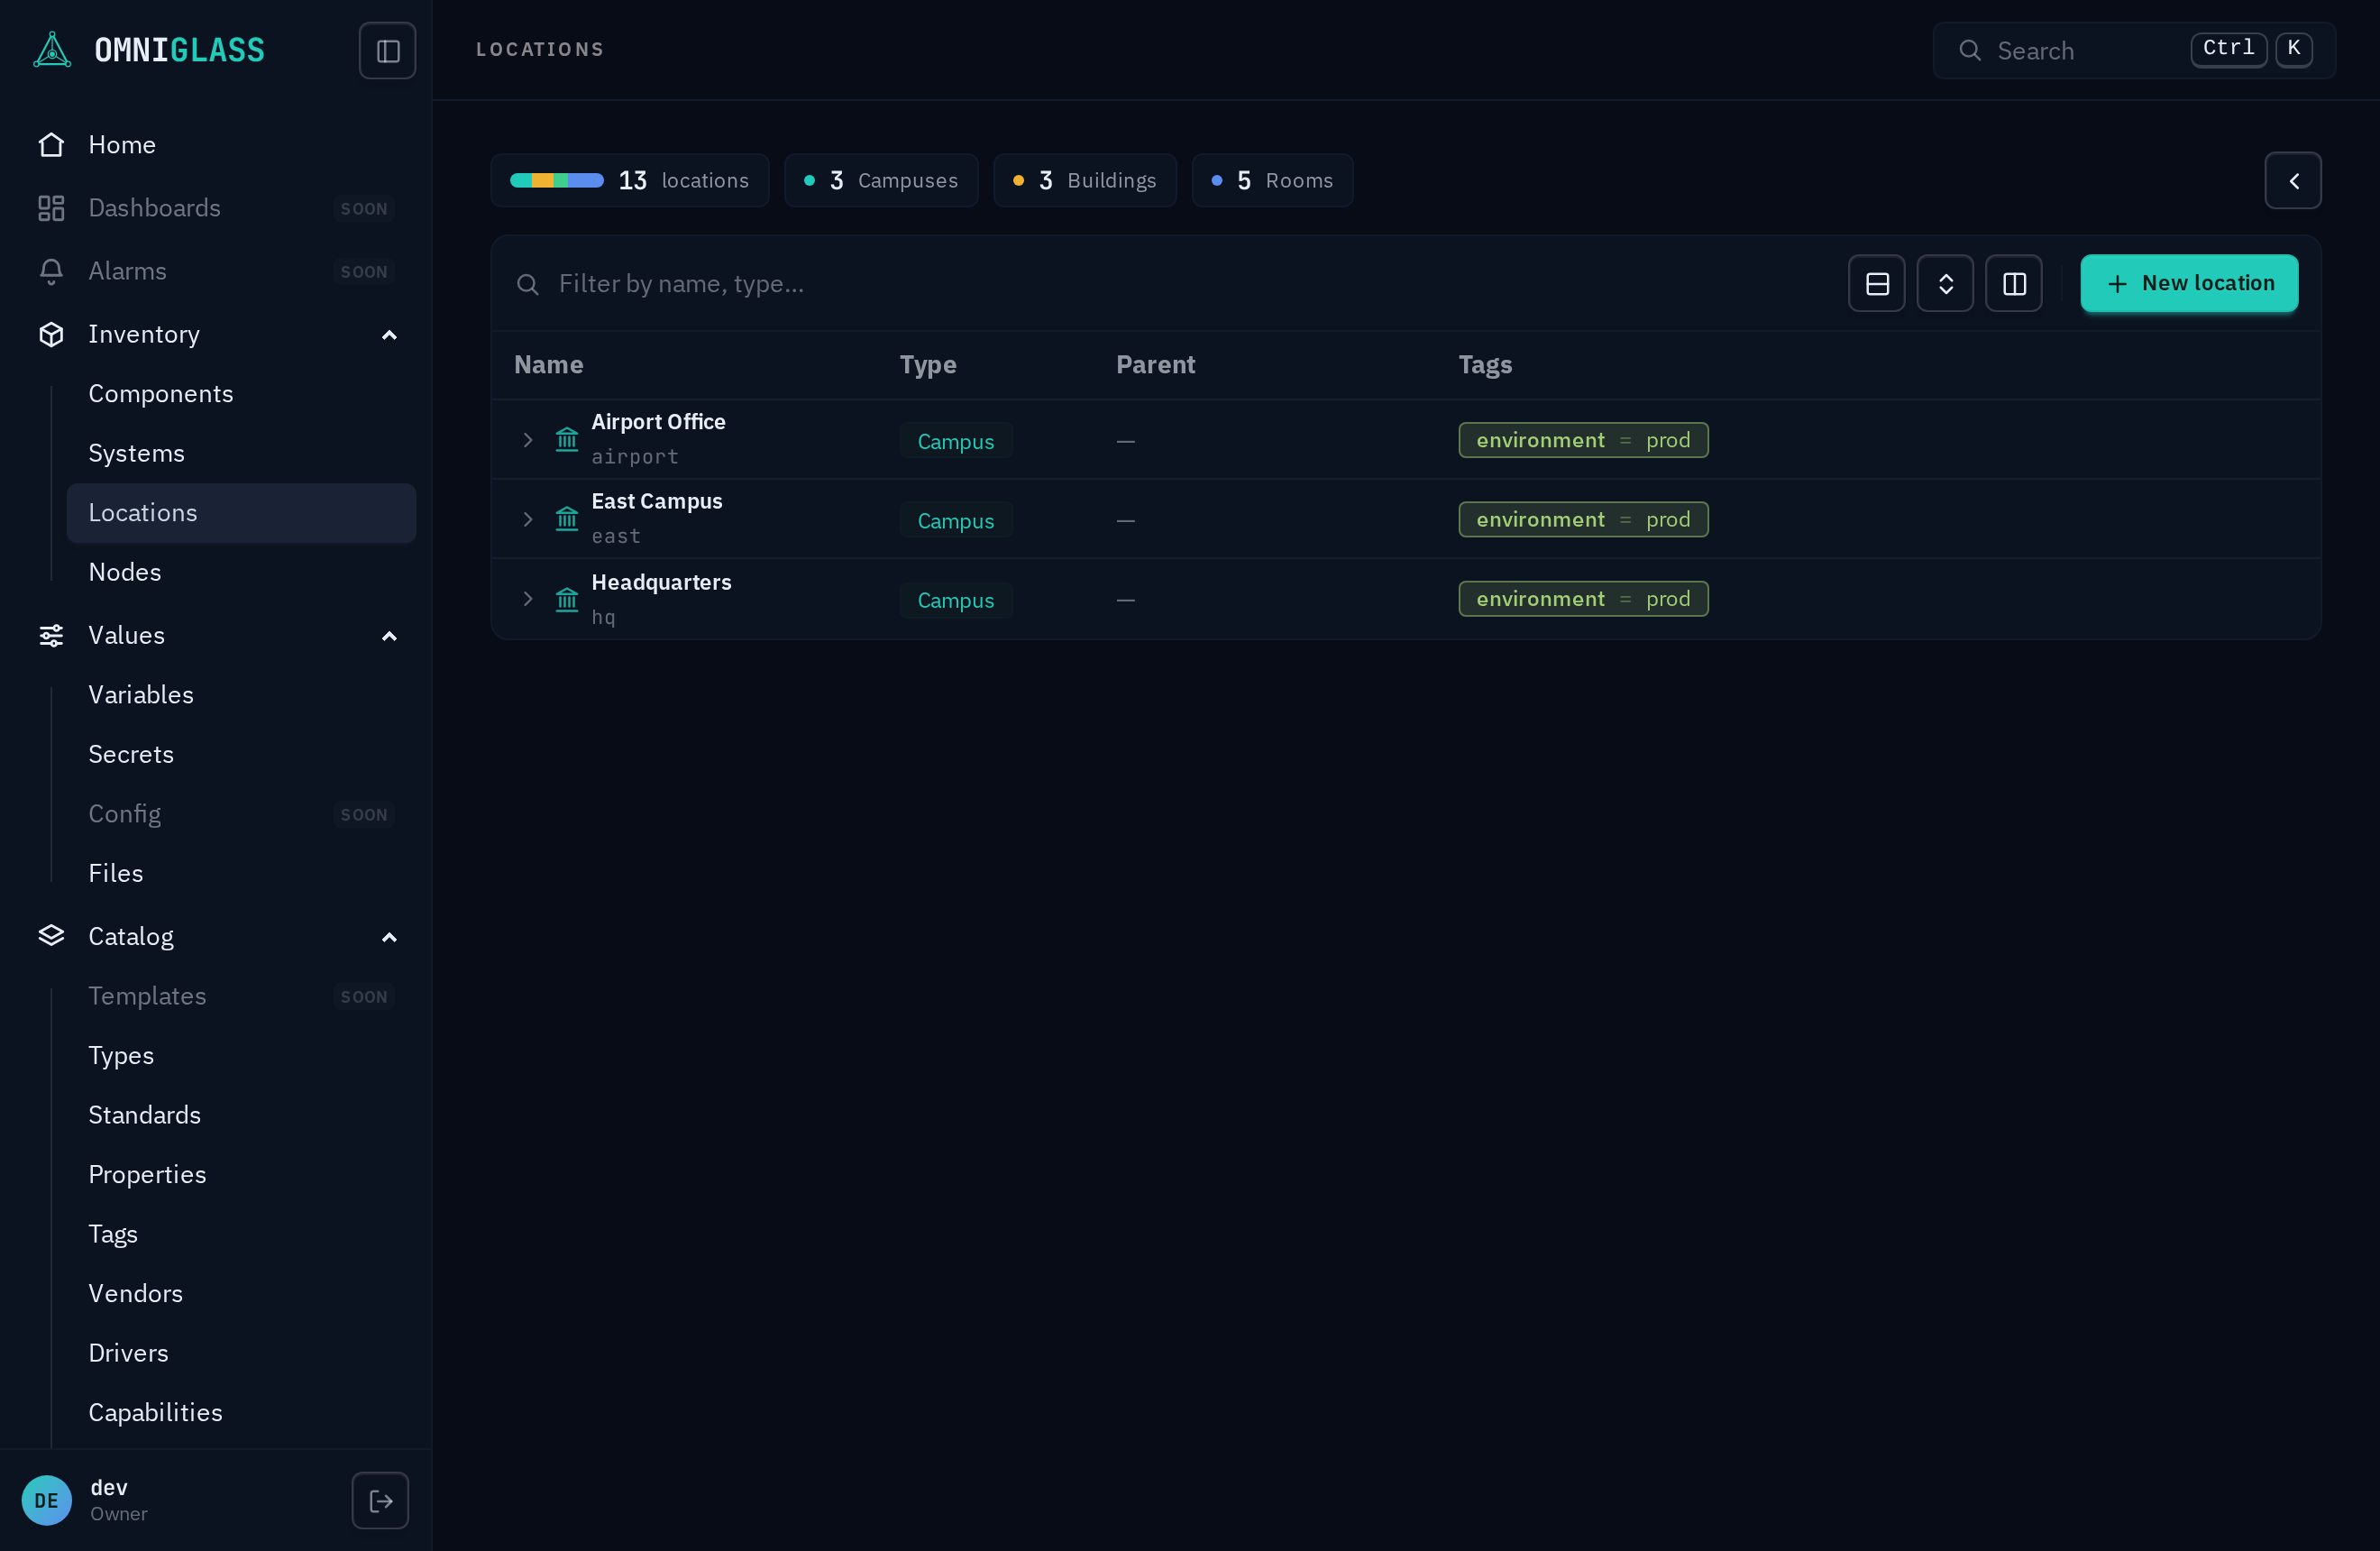
Filter
Section titled “Filter”The bar at the top of the table is a chip filter. Type a field name, then an operator, then a value; each commit becomes a chip:
- Within one chip, multiple values are OR (match any). Across chips, the filters are AND (match all).
- Click a chip’s operator to cycle it; click its value to re-edit; the x removes it. Clicking an active summary facet (below) toggles the same chip.
- A summary widget or a count card is just a one-click shortcut to a filter chip.
- Filter by a tag through the tag field: choose
tag, then the tag key, then a value, to match its effective value (a component matches on a tag it inherits from its system or location, not only one set on it directly). Two operators, is set and is absent, take no value and find the rows that carry the tag at all or lack it entirely. Every tag in use is reachable this way, so the list tracks whatever your fleet is tagged with.
This is a page-local filter, distinct from the global ⌘K jump that moves you between sections (getting around).
Tree, list, columns
Section titled “Tree, list, columns”- Tree entities (Locations, and Systems/Components where they nest) show as a tree; use the expand/collapse controls, or switch to list view. Filtering also flattens to a list, with each row’s place in the tree shown above its name.
- The default list order is the tree compressed to a flat list (nesting preserved); click a column header to sort by it instead.
- The Name column carries both halves of an entity’s identity: the label it goes by on
the first line, and beneath it, in the data face, the name the API, the CLI, and the URL address
it by. An entity with no label shows its name alone, in the data face, so an absence reads as
an absence rather than a typo. That second line is what you copy into an
omniglasscommand. The column is headed Name on every page and sorts on the line you are reading down. It keeps a minimum width on a narrow screen: on a 1366x768 laptop the list scrolls sideways rather than squeezing the identifier out, and hiding a column you are not using (the Tags column is the widest) is what removes the sideways scroll. - Who wrote a label is shown where you can change it, not in the list. A label the platform
rendered from a label rule opens locked in the row’s edit blade,
with the rule stated under the field; the lock beside it hands you the pen, and the restore arrow
hands it back. A list shows no mark either way, so the Name column spends its width on the name.
To see the whole set of rows a rule edit would rewrite, which is the question a per-row mark could
only ever answer one row at a time, run
omniglass <entity> previewLabels: it lists exactly the rows the platform still labels, and nothing you typed yourself. - Upgrading into a new rule does not relabel anything you already have. Locations shipped with no
label rule before, so a fleet created then keeps reading its raw names (
north-wing) after the upgrade. Applying the new rule is your act, and there is no console button for it yet: runomniglass location previewLabelsto see exactly which rows would move, thenomniglass location recomputeLabelsto apply it, and the same rows read North Wing. Nothing you typed yourself is touched by either. - The same applies to systems, and the upgrade worth running is this one. A system’s shipped label
now carries the number its name carries, so the two halves of a divisible boardroom read Boardroom
and Boardroom 2 instead of both reading “Boardroom”. A fleet created before the upgrade keeps
both halves reading alike until you run
omniglass system previewLabelsand thenomniglass system recomputeLabels. Only the first of a kind in a room is bare: a room with one boardroom in it reads Boardroom, exactly as its name isboardroomrather thanboardroom-1. - The columns menu shows or hides columns and lets you drag to reorder them. The layout is remembered per browser.
- On Locations, each row wears its type’s icon as a leading glyph (a campus, building, floor, and room each read differently at a glance), tinted the same hue as the type badge.
- On Locations, a summary board at the top breaks the fleet down by place type (a donut plus count cards); click any segment or card to filter to it.
- A Tags column shows each row’s effective tags: the
key = valuelabels that resolve onto it down the cascade, not only the ones set directly on it (so a component wears the tags of its location and system too). Each key gets its own consistent color, so the same tag reads the same everywhere. The chips stay on one line, fading at the edge when there are more than fit; hover the row’s tags to reveal the full set in a popover. The column is on by default; hide it from the columns menu.
Everything on these pages is already filtered to your scope: you are searching within the subtree your grants reach, not the whole fleet.
The Files directory (under Values) uses these same filter, column, and list controls, but it holds uploaded content, not the fleet, so it is covered separately.